How Add and Use Custom Fields to Enrich your Zaps
Want to integrate custom fields created in Pro Pipe Lines in your zaps? In this guide, we illustrate how you can add and use your custom fields to announce a won lead in Slack.
All you need to set it up are Slack, propipelines.com, and Zapier accounts.
If you don’t have an account with propipelines.com, click here to start a FREE trial.
If you don't have an account with Slack, click here to start a FREE account.
If you don't have an account with Zapier, click here to sign up for a FREE trial.
Get Started
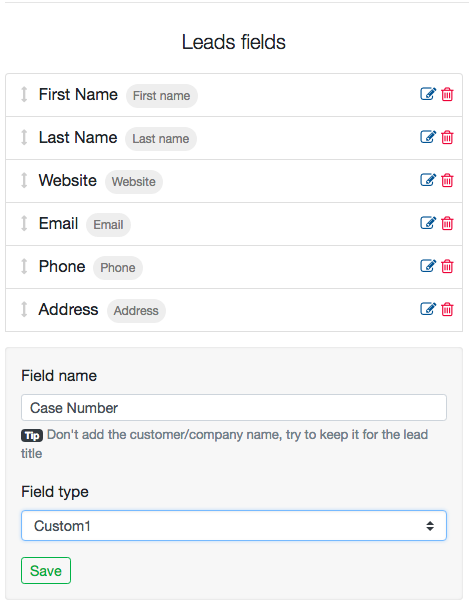
⚠️ Only Expert Edition users have up to 5 custom fields to add.
Before setting up your zaps, create your custom fields in propipelines.com. Go into your Admin Panel > Default fields. Add in your desired Field Name and select the Field Type as Custom 1, 2, 3, 4, or 5. In the example shown below, we've added "Case Number" as a new field.
Connect your TRIGGER App Account and Set Up the Trigger
Sign into your Zapier account and click on the MAKE A ZAP! button at the very top where you will be directed to a new page:

1. Choose the Trigger App: propipelines.com
2. Choose the Trigger: New Lead Status Changed to...
3. Connect Zapier to your propipelines.com account if you haven’t already by

4. Choose the Status Event Name as WON
5. Test the step by creating a new lead and changing the status to WON in your propipelines.com account and you’re done setting up your trigger!
Connect your ACTION App Account and Set Up the Action
1. Choose an Action App: Slack
2. Choose an Action: Send Channel Message
3. Connect Zapier to your Slack account
4. Edit Template to set up your message and add the Custom Field in it.
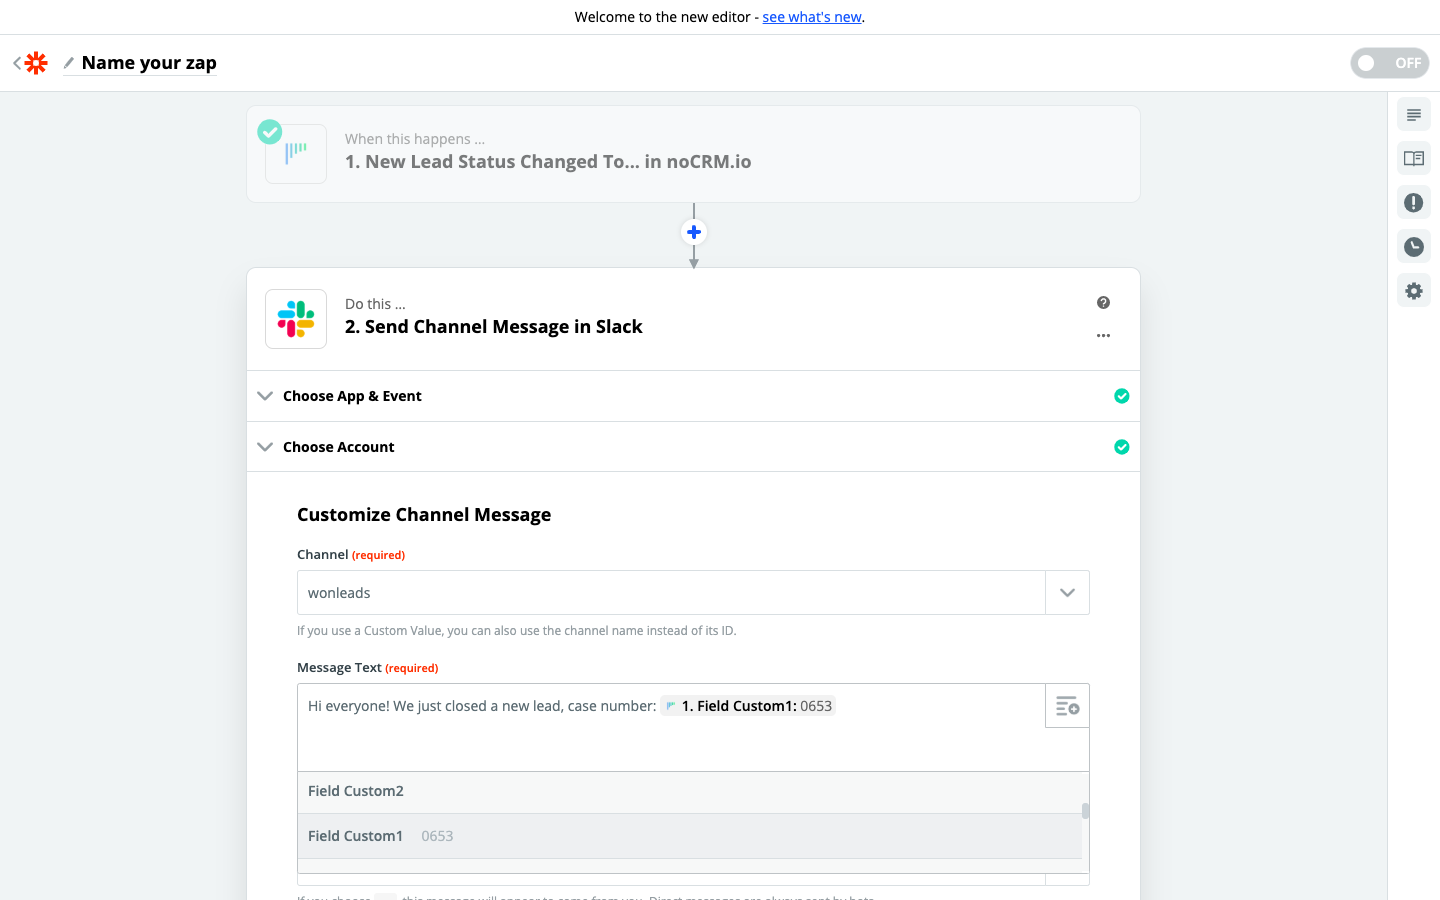
5. Test the step and the Action set up is finished.