How to Assign Incoming Leads Randomly Across Users In Your Account
As a sales manager, sometimes you need to split the information evenly among your sales team so each sales reps have the same amount of leads. Now with this automation, you can automatically assign leads received in the unassigned leads menu randomly to users in the account. Whether they came from Facebook Leads, your website, or an email.
All you need to set it up are propipelines.com, and Zapier accounts.
Note: This integration is available only for Expert and Dream Team Edition.
If you don’t have an account with propipelines.com, click here to start a FREE trial.
If you don't have an account with Zapier, click here to sign up for a FREE trial.
Get Started
Connect your TRIGGER App Account and Set Up the Trigger
Sign in to your Zapier account and click on the MAKE A ZAP! button at the very top where you will be directed to a new page:

1. Choose the Trigger App: propipelines.com
2. Choose the Trigger: New Unassigned Lead
3. Connect Zapier to your Pro Pipe Lines account if you haven’t already by

4. Set up the trigger:Add a name for the event and type: Automatic assignment
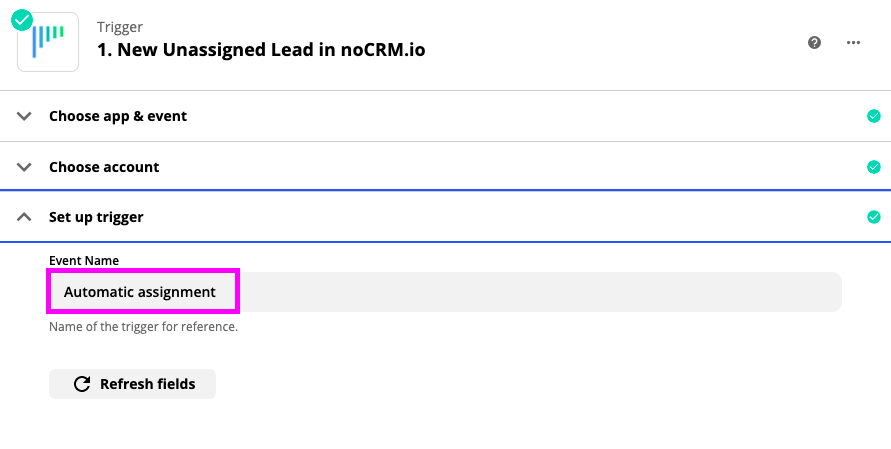 5. Test the step by using a lead in your “Unassigned Leads” and you’re done setting up your trigger!
Connect your ACTION App Account and Set Up the Action
You will need to generate a new API Key for this section.
1. Choose an Action App: Code by Zapier
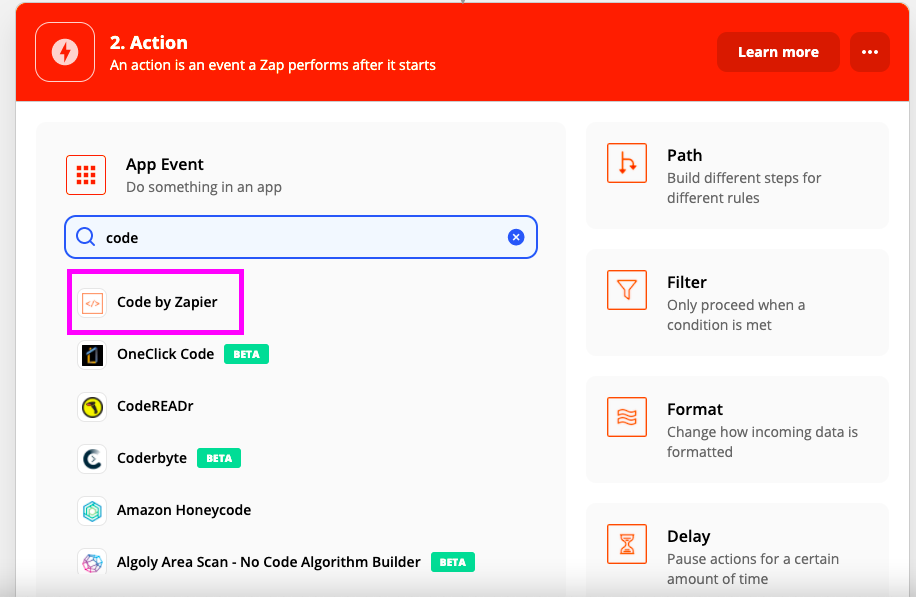 2. Choose an Event: Run Python
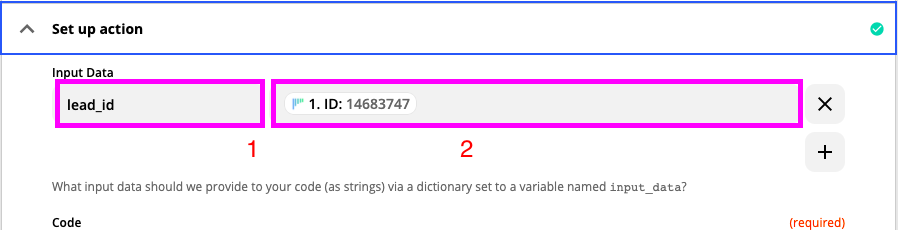
3. Set up Action: Add “lead_id” in the first box and find the ID value for the second one
 4. Code: Open this file to copy and paste the code. You will need to replace the API KEY value and the slug of the account. We highlighted the fields in the code for you.
5. Test the step and the Action set up is finished!.