Categories & tags
Categories & tags are very important inside Pro Pipe Lines since they are the only way of filtering information and obtaining insightful statistics. You cannot filter by lead field, so make sure to create all the categories & corresponding tags at the very beginning.
In this article, we explain how to create categories & tags in your Pro Pipe Lines account, how to edit them if necessary, and share few articles on the power of tags.
How to create categories and tags
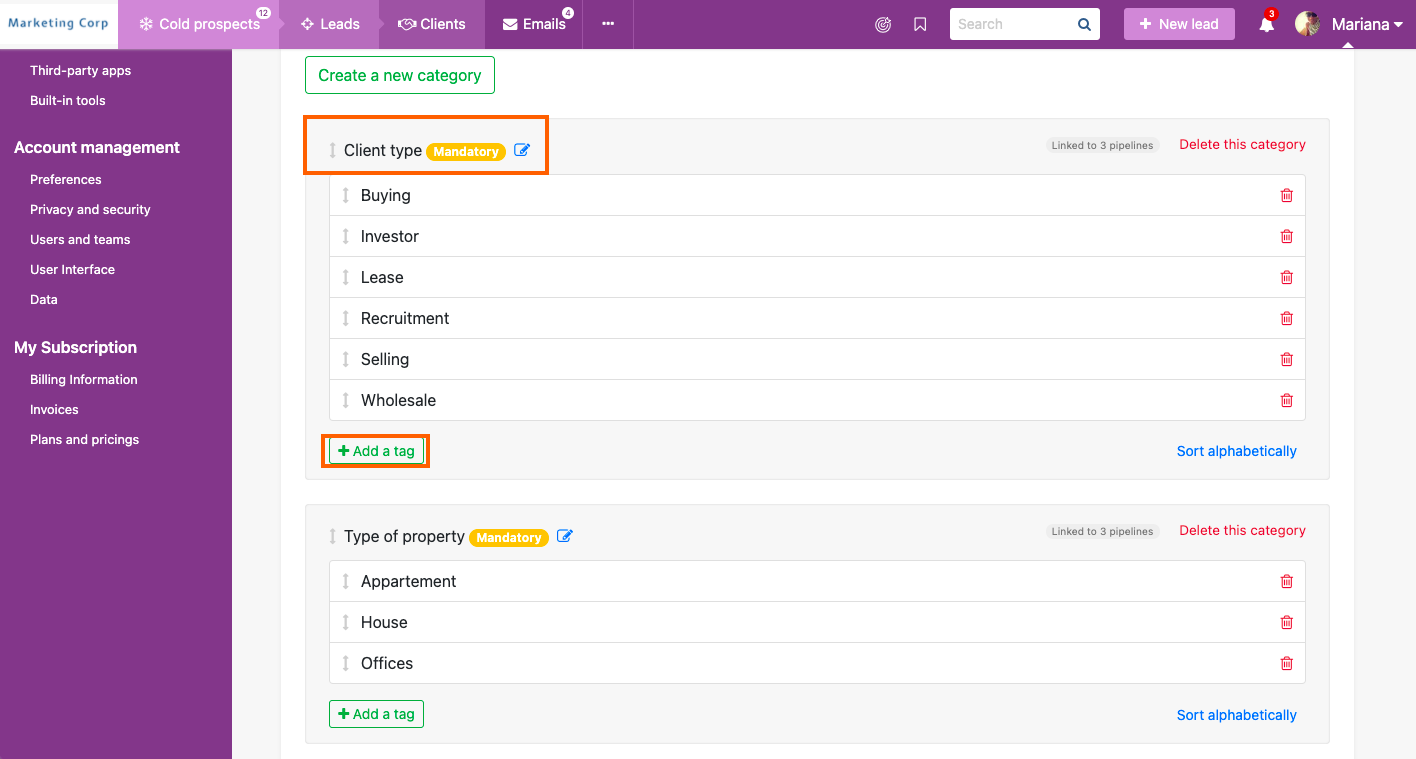
To create categories and tags, go to Admin panel > Sales Process > Categorize your leads
When you create a predefined tag, you must create it in a category. You can place them in alphabetical order, or use the arrows on the left side to order them as you prefer.
Typical categories/tags could be:
- Origin (Website, Google, E-mail, Phone, Event, LinkedIn)
- Product (my super product n°1, product n°2)
- Company size (0-10,11-30,31-100)
⚠️ It's not possible to import a list of categories and tags, you have to create them manually.
There is no limit in the number of tags. Nonetheless, we suggest that you don't create too many as it might become confusing to your sales reps. Try to make it as user-friendly as possible. Also, if you happen to have multiple pipelines and some tags only apply to a specific pipeline, you can use the Pipeline-centric setup.
How to edit existing tags
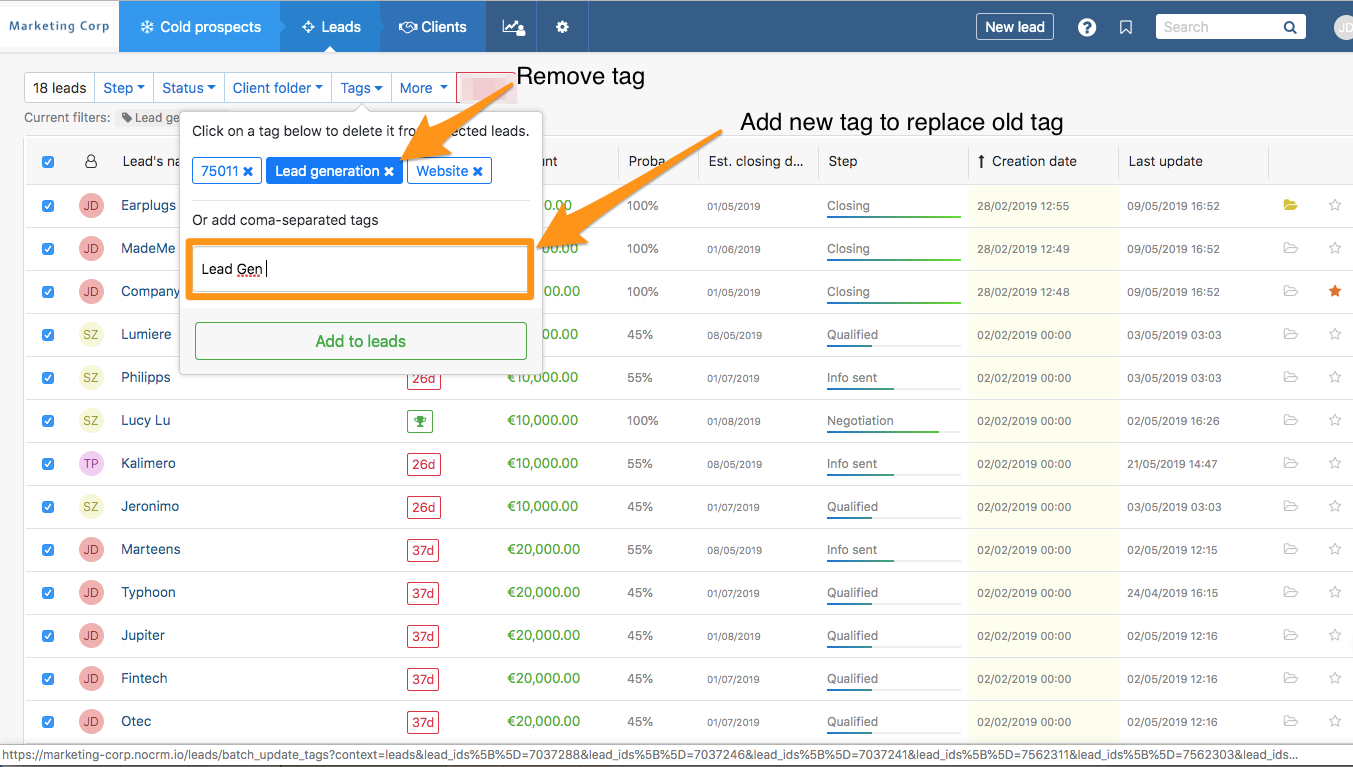
If you wish to edit a tag that you have predefined or manually created, the only way of doing it is the following:
- Filter by the tag you wish to change
- Choose the compact mode
- Select all leads
- Massively add the new tag
- Massively remove the old tag
- Go to your Admin > Categorize leads, remove the old tag and add the new one
The power of tags:
- How to organize your sales meeting more efficiently
- Know where your customers come from & define your sales strategy accordingly
- Building a Competition analysis system with tags
- Upselling with tags
Watch this quick video